
Getting started
In this tutorial you build one campaign tile from scratch and watch it appear in a real category listing. It takes about ten minutes.
By the end you will have a banner with a headline, a call to action and a background image, sitting in the fifth slot of a category page and two product cells wide.
Before you begin
You need:
- A Shopware 6.7 shop with Listing Interrupter & Banner Studio installed and activated.
- Admin access with the Listing Interrupter permissions (an administrator has them).
- A category that already contains a handful of products, and the sales channel that category belongs to.
- One image in the Media library to use as the banner background.
Step 1 — Open the module
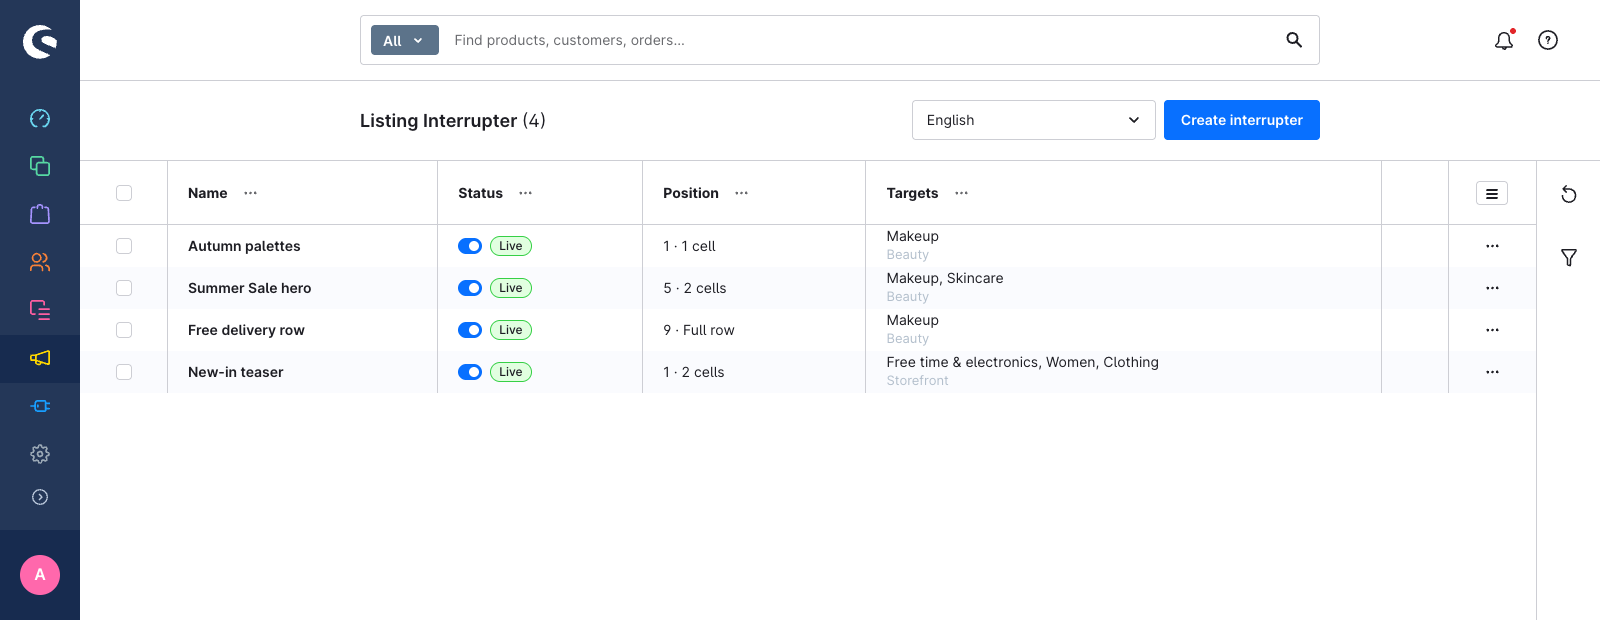
In the admin, go to Marketing → Listing Interrupter.
The list shows every tile in the shop. On a fresh install it is empty.
Step 2 — Create a tile
Click Create interrupter.
A new tile opens on the Content tab. It is already switched on and starts life as a one-cell banner in slot 1 of page 1 — you will change that in a moment.
Step 3 — Name the tile
In the General card, type a name:
Summer Sale heroThe name is internal. Shoppers never see it; it identifies the tile in the list.
Step 4 — Write the banner
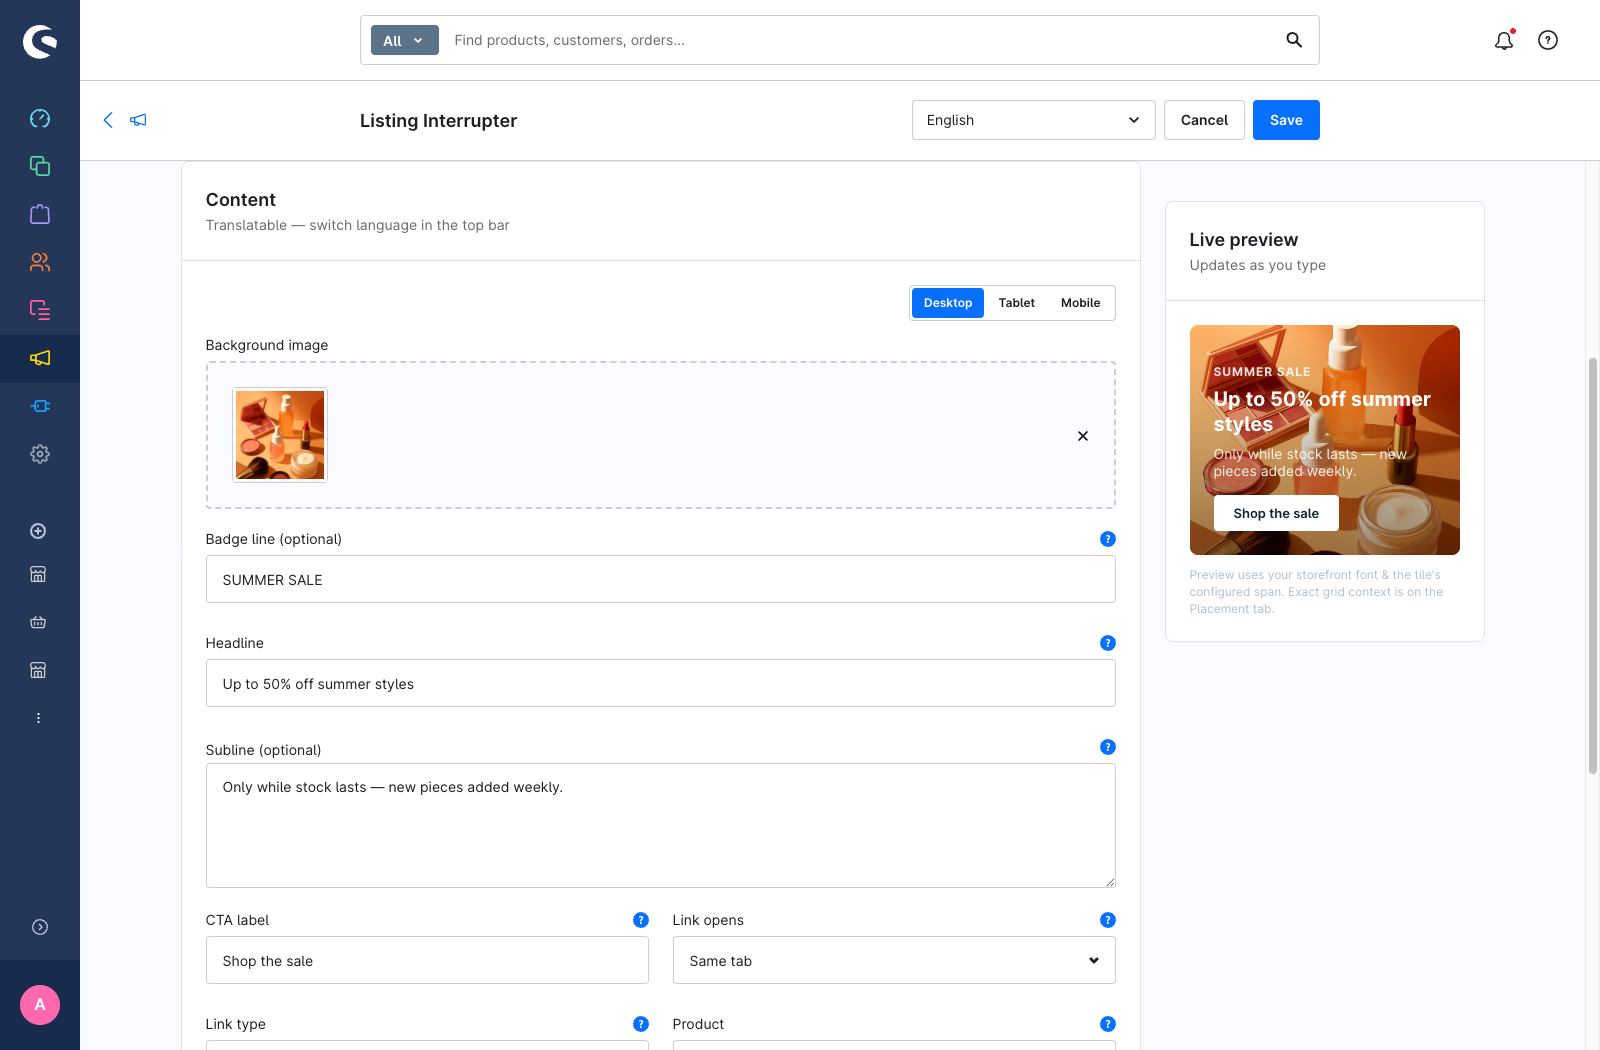
Fill in the Content card. Every field here is translatable — you are editing the language shown in the top bar.
- Background image — click the media area and pick an image from your Media library.
- Badge line — type
SUMMER SALE. This is the small label above the headline. - Headline — type
Up to 50% off summer styles. - Subline — type
Only while stock lasts — new pieces added weekly. - CTA label — type
Shop the sale. - Link type — choose Category, then pick the category the button should open.
Watch the Live preview on the right. It redraws on every keystroke, so the tile takes shape while you type.
Step 5 — Style the tile
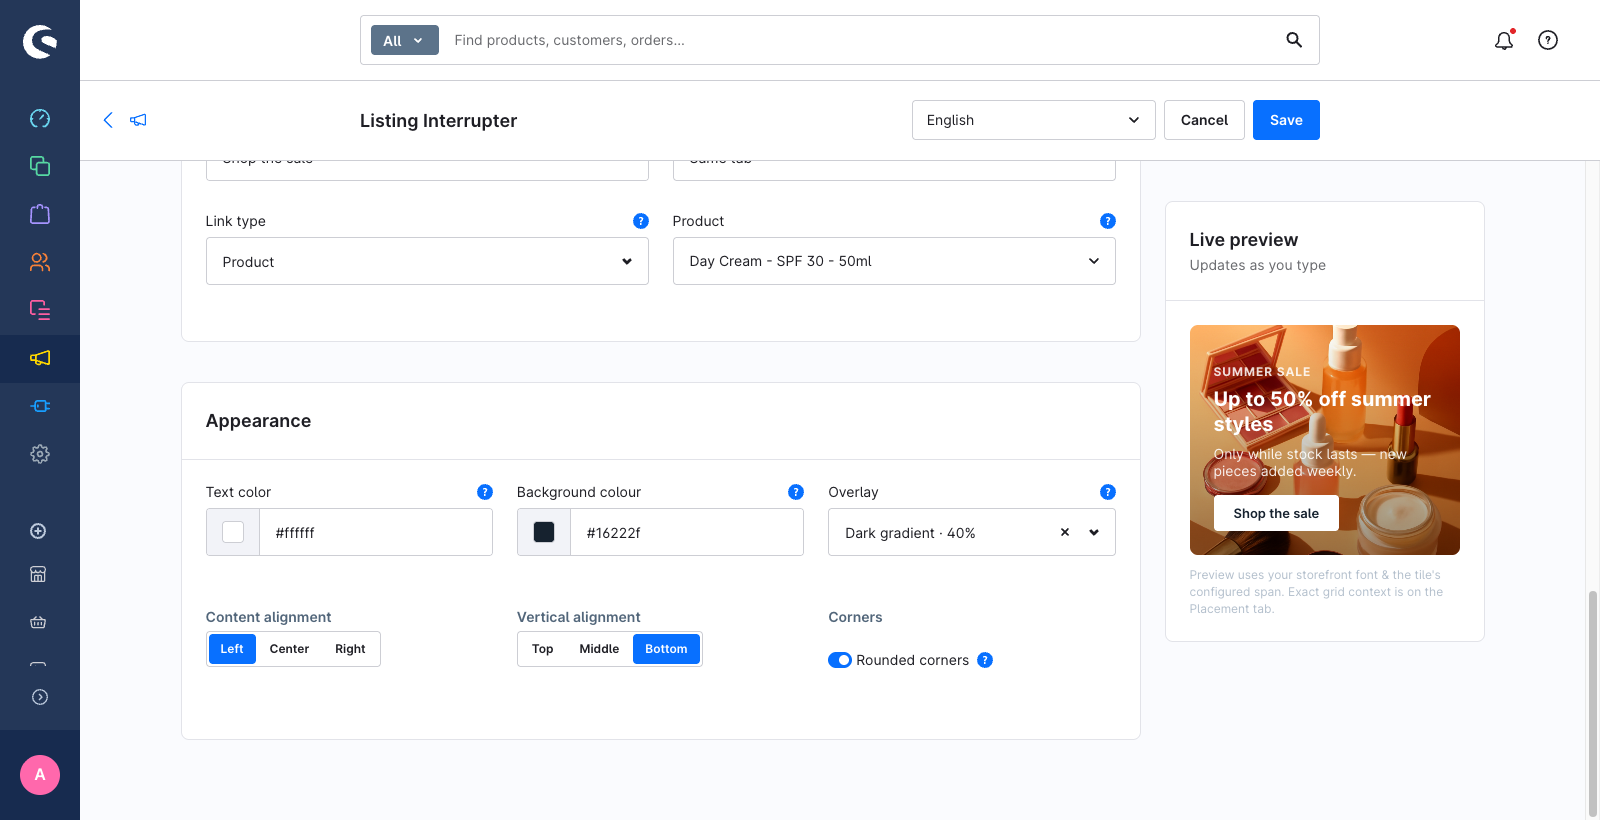
Scroll to the Appearance card and set:
- Text color — white.
- Overlay — Dark gradient · 40%. The overlay darkens your background image so the text stays readable over it.
- Content alignment — Left.
- Vertical alignment — Bottom.
Step 6 — Choose where the tile runs
Switch to the Placement tab.
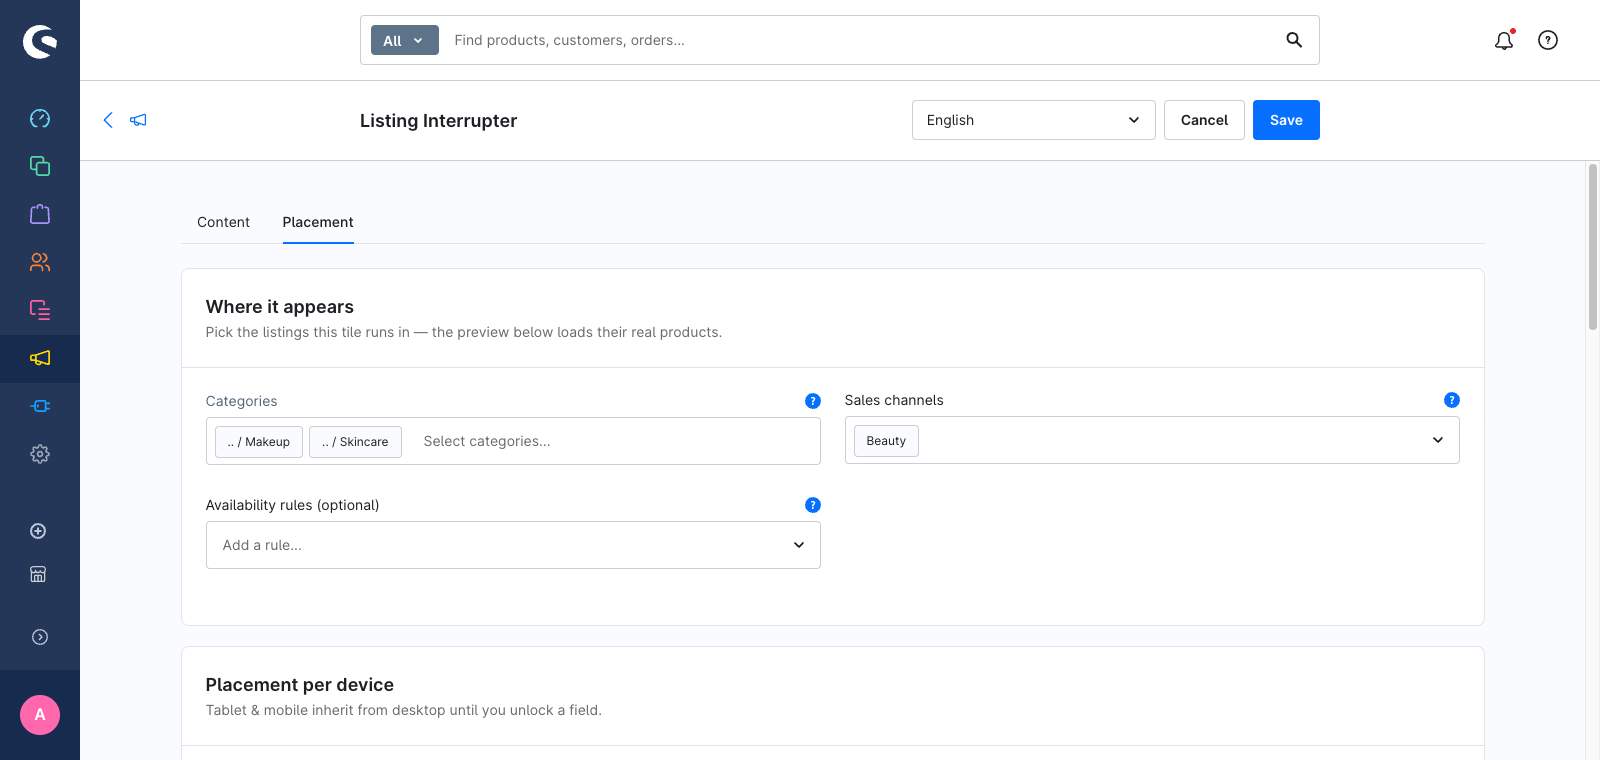
In the Where it appears card:
- Categories — check the category you picked in Before you begin.
- Sales channels — add the sales channel that category belongs to.
Leave Availability rules empty. An empty rule list means everyone sees the tile.
Both fields matter: a tile with no category, or with no sales channel, is never shown in the storefront.
Step 7 — Place the tile in the grid
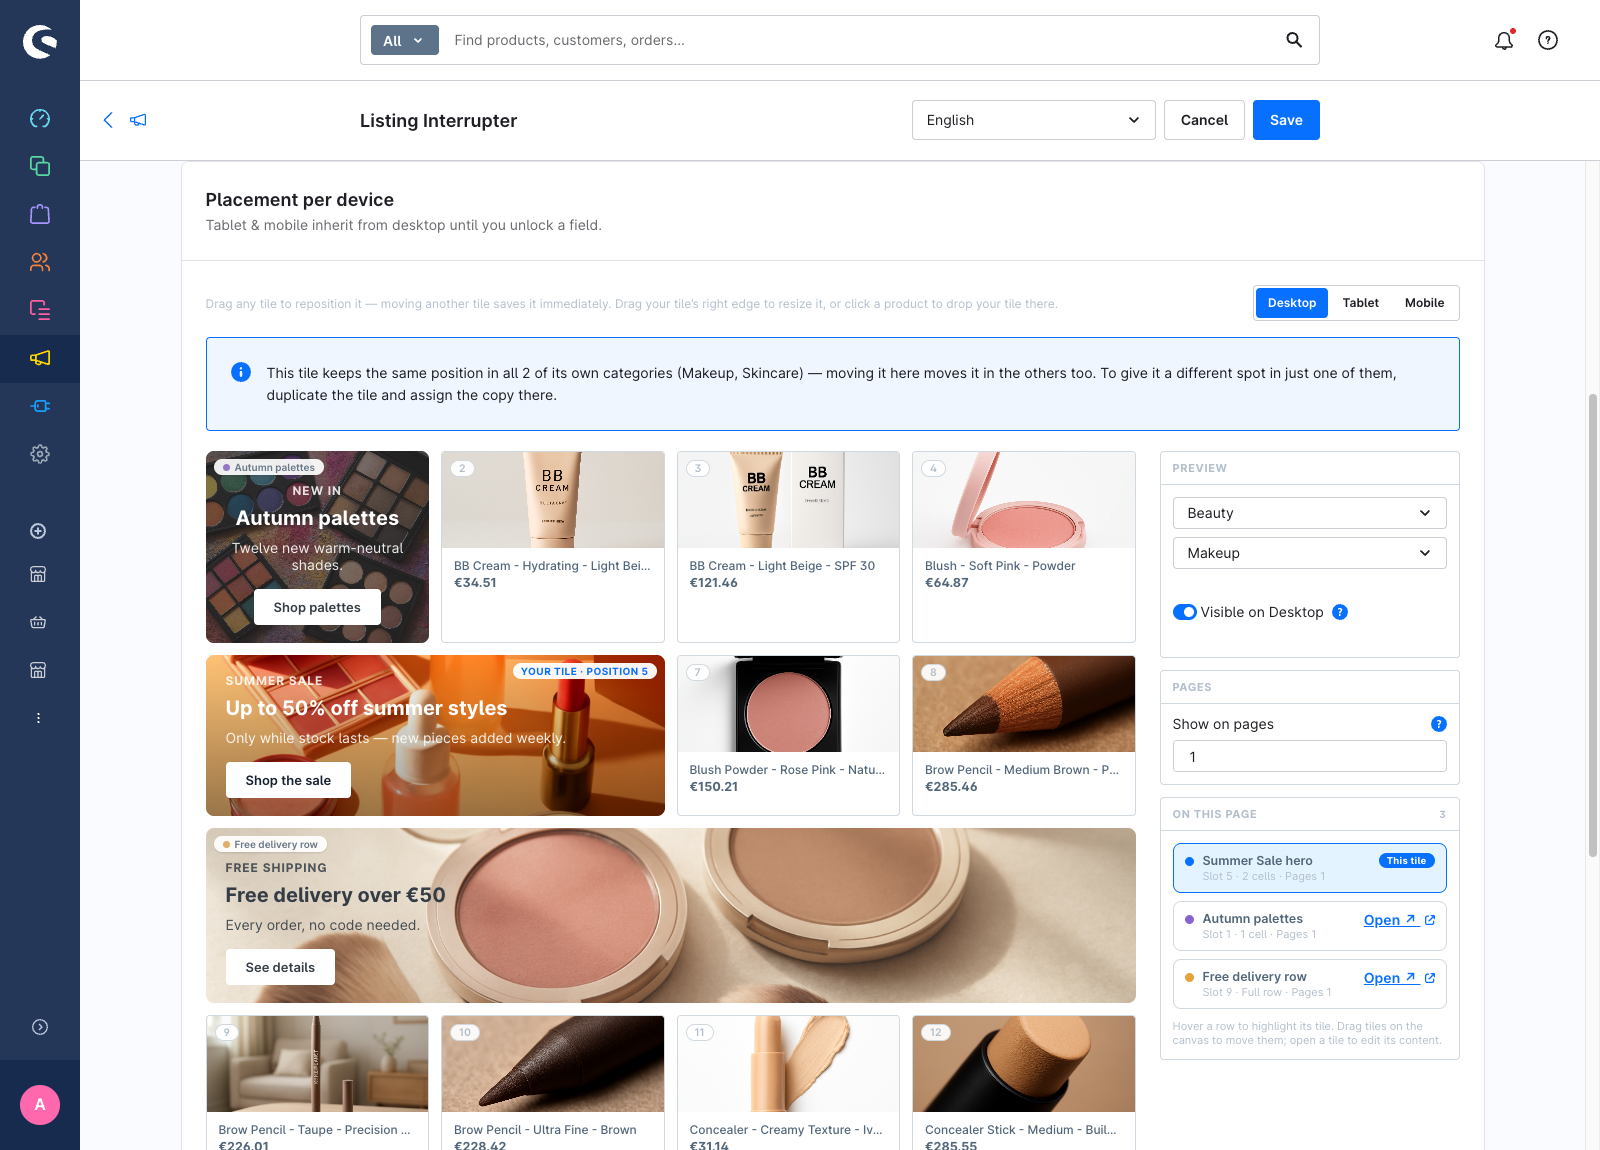
Below, the Placement per device card has loaded the real products of that category into a canvas. Your tile sits in slot 1, marked Your tile · position 1.
- Drag the tile onto the fifth product. It snaps into that slot and pushes the products behind it one cell along.
- Grab the handle on the tile's right edge and drag it one cell to the right. The tile is now two product cells wide.
Step 8 — Save
Click Save in the top bar. A confirmation appears: Interrupter saved.
The tile stays open. If you go back to Marketing → Listing Interrupter, it is now listed with the status Live.
Step 9 — See it in the storefront
Open the category page in your storefront and reload it.
Your banner sits in the fifth slot, two cells wide, with its badge, headline, subline and button. The listing still closes on a full grid row: the tile took the place of two products, and those two products moved to the next page rather than disappearing.
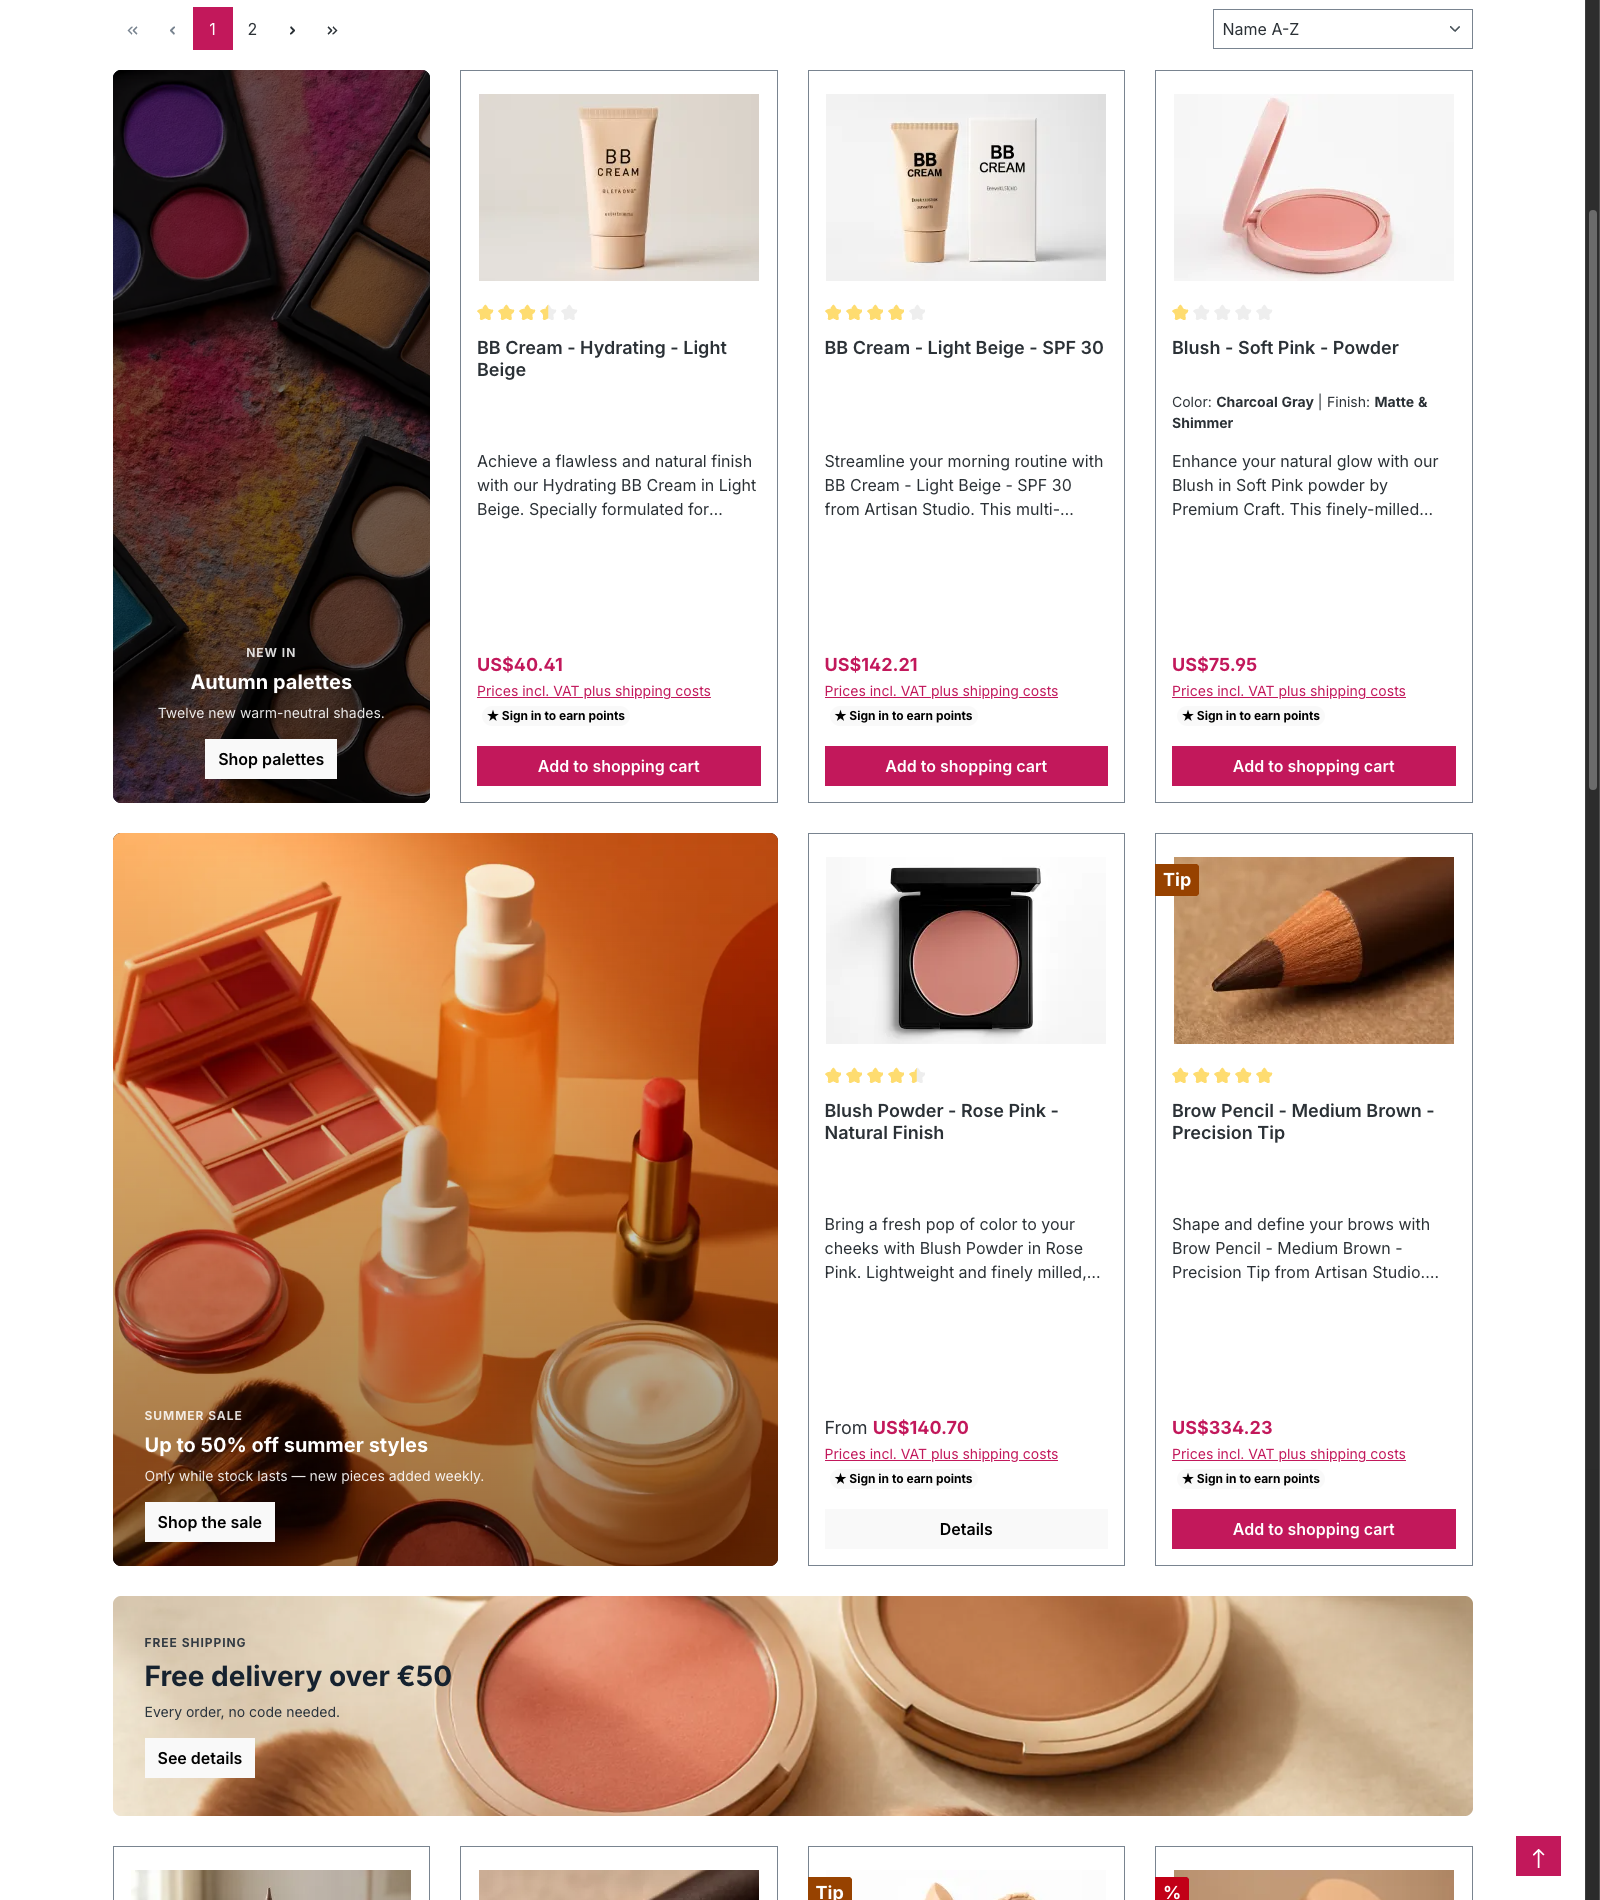
You did not clear a cache. Saving a tile refreshes the listing pages it affects on its own.
What you built
One banner tile, targeted at one category in one sales channel, placed in slot 5 of page 1 and two cells wide.
Next steps
- Place a tile in the grid — pages, multiple tiles, full-row heroes.
- Target a tile — page ranges, audiences and campaign schedules.
- Adapt a tile for tablet and mobile.
- Concepts — what a slot really is, and why the grid stays full.