
Getting started with PackGuard
This tutorial takes you from a freshly installed plugin to your first box recommendation on a live order. It covers the minimal happy path — install, configure, add boxes, and see the suggestion card in action.
Time required: about 10 minutes.
What you need:
- PackGuard installed and activated (see below)
- At least one order in Shopware with products that have
length,width, andheightfilled in - Admin access with the
ssd_packguard.creatorrole (or a full administrator account)
Step 1 — Install and activate the plugin
- In the Shopware Admin, open Extensions > My extensions.
- Locate PackGuard and click Install, then Activate.
- Confirm the plugin appears as Active in the list.
If you are installing on a development environment using the Shopware CLI:
bin/console plugin:install --activate SsdPackGuard
bin/console cache:clear
Once activated, a PackGuard section appears under Orders in the main navigation.
Step 2 — Open plugin configuration
- Go to Extensions > My extensions > PackGuard > Configuration (the three-dot menu next to the plugin).
- The General Settings card opens.
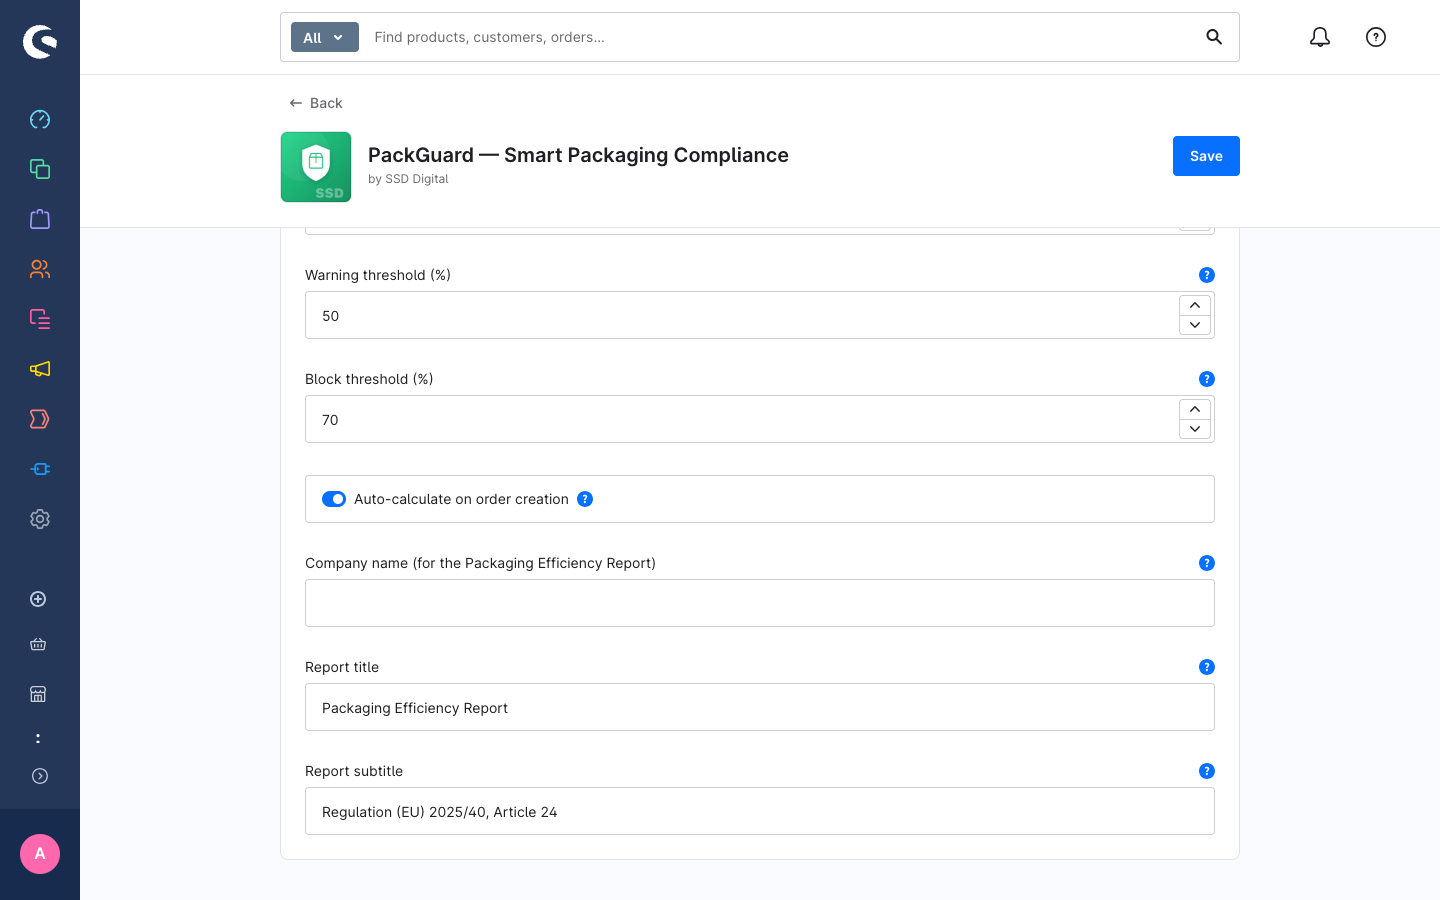
- Leave the defaults in place for now:
- Tracking threshold: 30% — orders with less than 30% empty space are not recorded at all
- Warning threshold: 50% — at or above 50% the order is flagged as a warning
- Block threshold: 70% — at or above 70% box selection is rejected
- Auto-calculate: on
- If you want Packaging Efficiency Report PDFs to show your company name, enter it in Company name (for the Packaging Efficiency Report).
- Click Save.
Step 3 — Add boxes to your catalog
PackGuard needs to know which boxes you actually stock before it can make suggestions.
- In the navigation, go to Orders > PackGuard > Box Catalog.
- If your catalog is empty, click Import presets in the centre of the page.
- In the preset modal, tick the box archetypes that match your stock — for example Carton S, Carton M, and Polybag M.
- Click Import 3 (the count matches your selection).
- The three boxes appear in the catalog list.
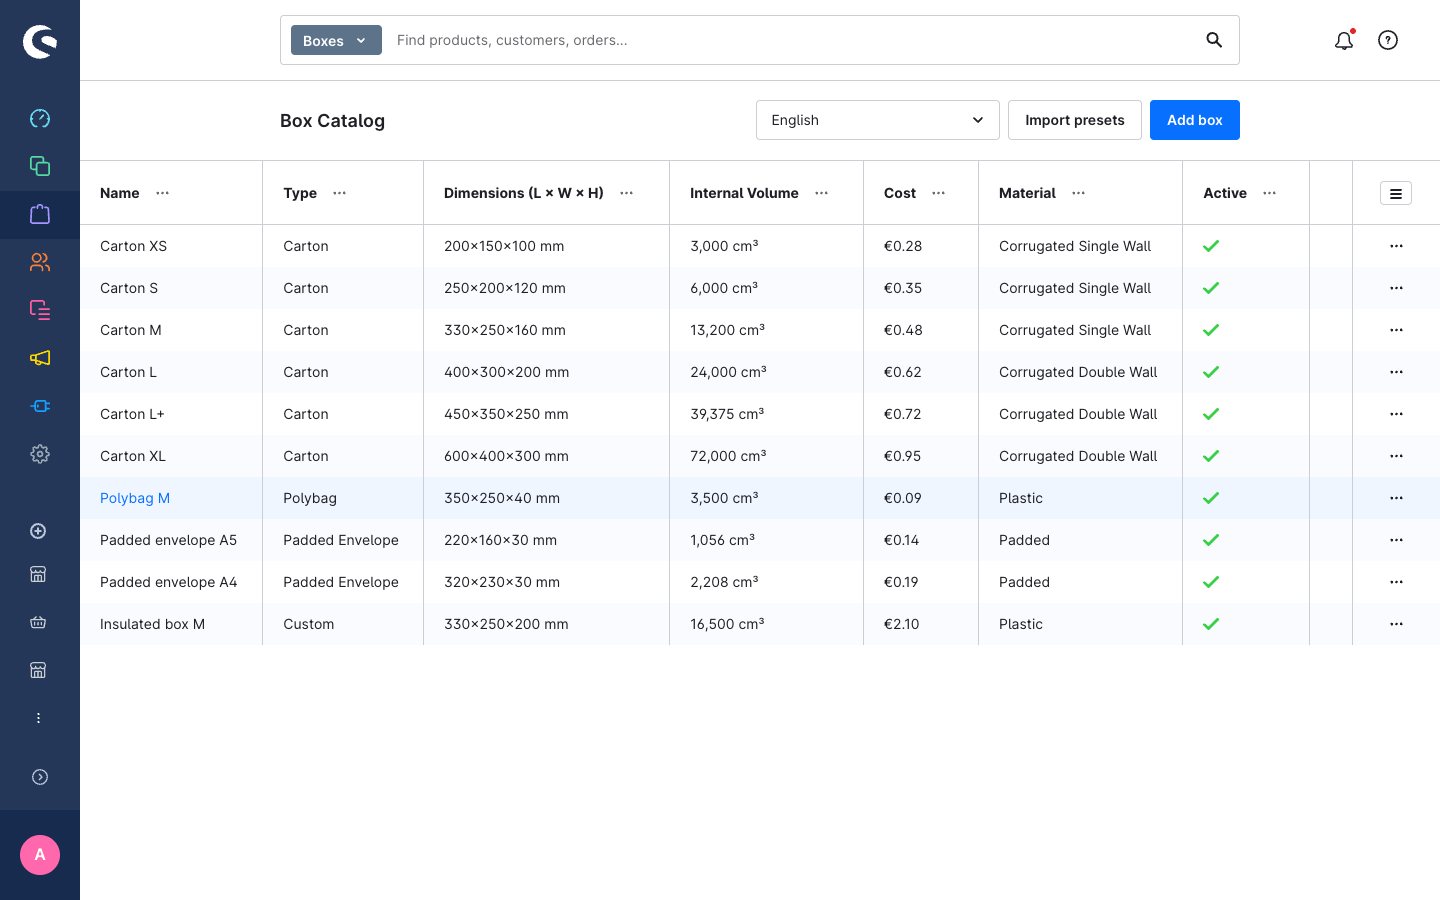
After import, open each box and adjust the internal dimensions (L × W × H in mm) and the cost per unit to match your real stock. The internal volume is calculated automatically.
Step 4 — Make sure your products have dimensions
PackGuard reads Shopware's built-in product dimension fields. Open any product, go to Specifications, and verify that Length, Width, and Height are filled in under Measures & Packaging.
If dimensions are missing, PackGuard cannot calculate the order volume. The order detail card will show an info alert prompting you to add dimensions.
Step 5 — See the box recommendation on an order
- Open Orders and click on any order that contains products with dimensions.
- On the order detail page, scroll down to the Packaging Recommendation card (added by PackGuard).
The card shows:
- Total product volume — the sum of all line-item volumes
- A table of boxes sorted by ascending empty space percentage
- A Best badge on the first compliant row
- Green (compliant), amber (warning), or red (violation) status dots per box
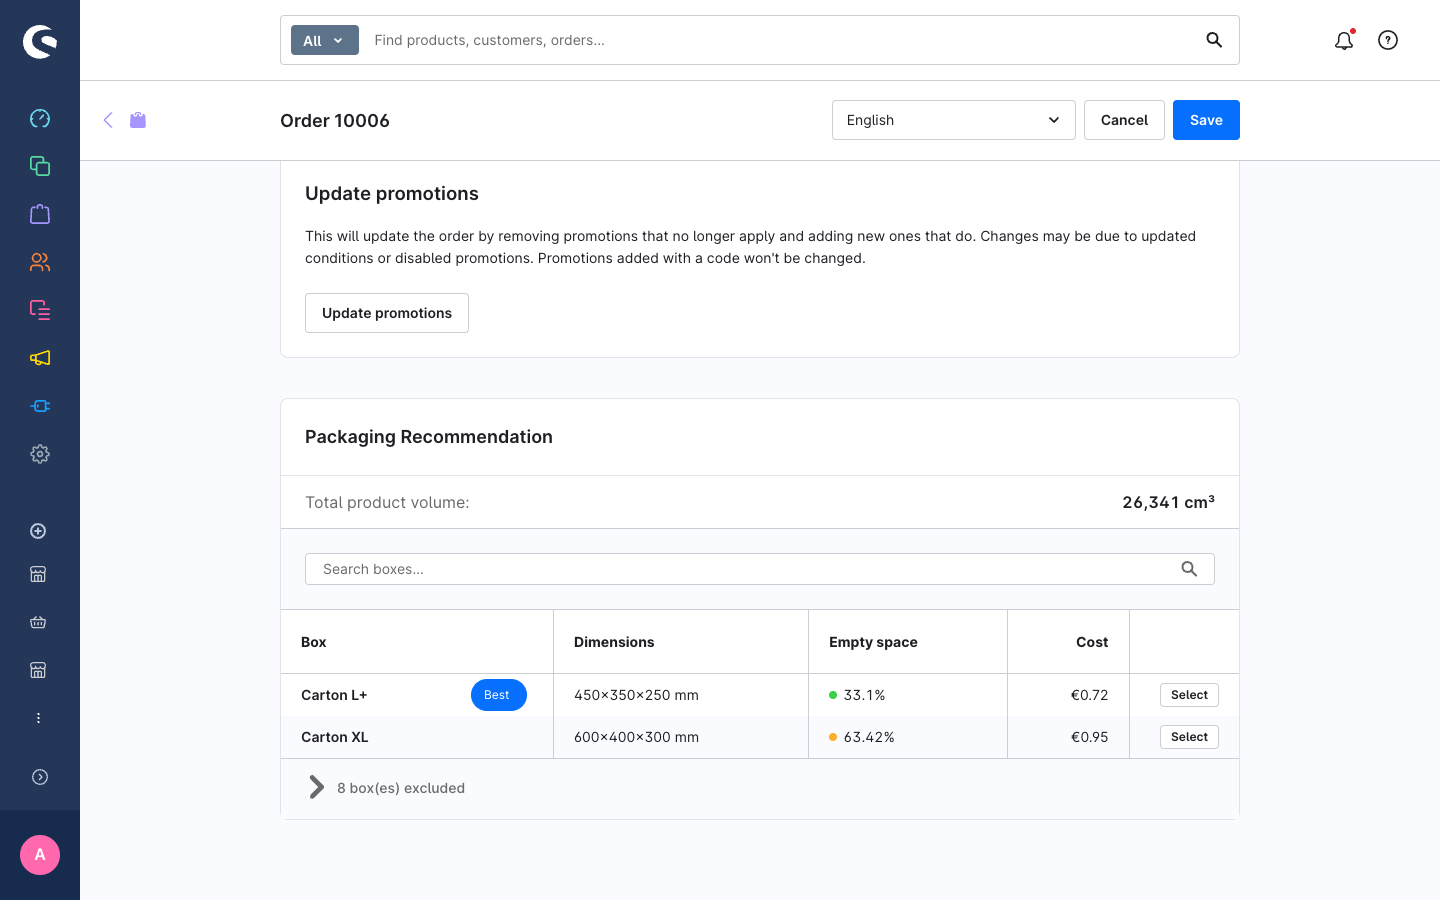
- Click Select on the row you want to use. If the box is in the warning range a confirmation dialog appears — click Select anyway to proceed.
- The card updates to show the Selected box summary with the saved empty space ratio and an estimated cost saving.
Congratulations — PackGuard has recorded your first box selection. The compliance dashboard under Orders > PackGuard > Dashboard will start showing aggregated metrics as more orders are processed.
Next steps
- Manage your box catalog — add, edit, and deactivate boxes
- Create a packaging profile — apply padding, orientation, and box-type constraints to product groups
- Generate a Packaging Efficiency Report — download the Packaging Efficiency Report PDF for a box type